The OVERLAP CONTROL section gives you powerful tools to create complex interactions between your fills. By controlling how fills intersect and cut through each other, you can achieve sophisticated artistic effects with precise control.
Compatibility Note: This feature works only with fills based on lines or curves. Text, Halftone, Trace, Wireframe, Fractals, and Scribble fills cannot use overlap controls.
Core Properties
Every fill can have two fundamental overlap properties:

 Cutting Property: Enables this fill to cut through other fills beneath it (if those fills have their "cuttable" property enabled).
 Cuttable Property: Allows this fill to be cut by other fills positioned above it (if those fills have their "cutting" property enabled).
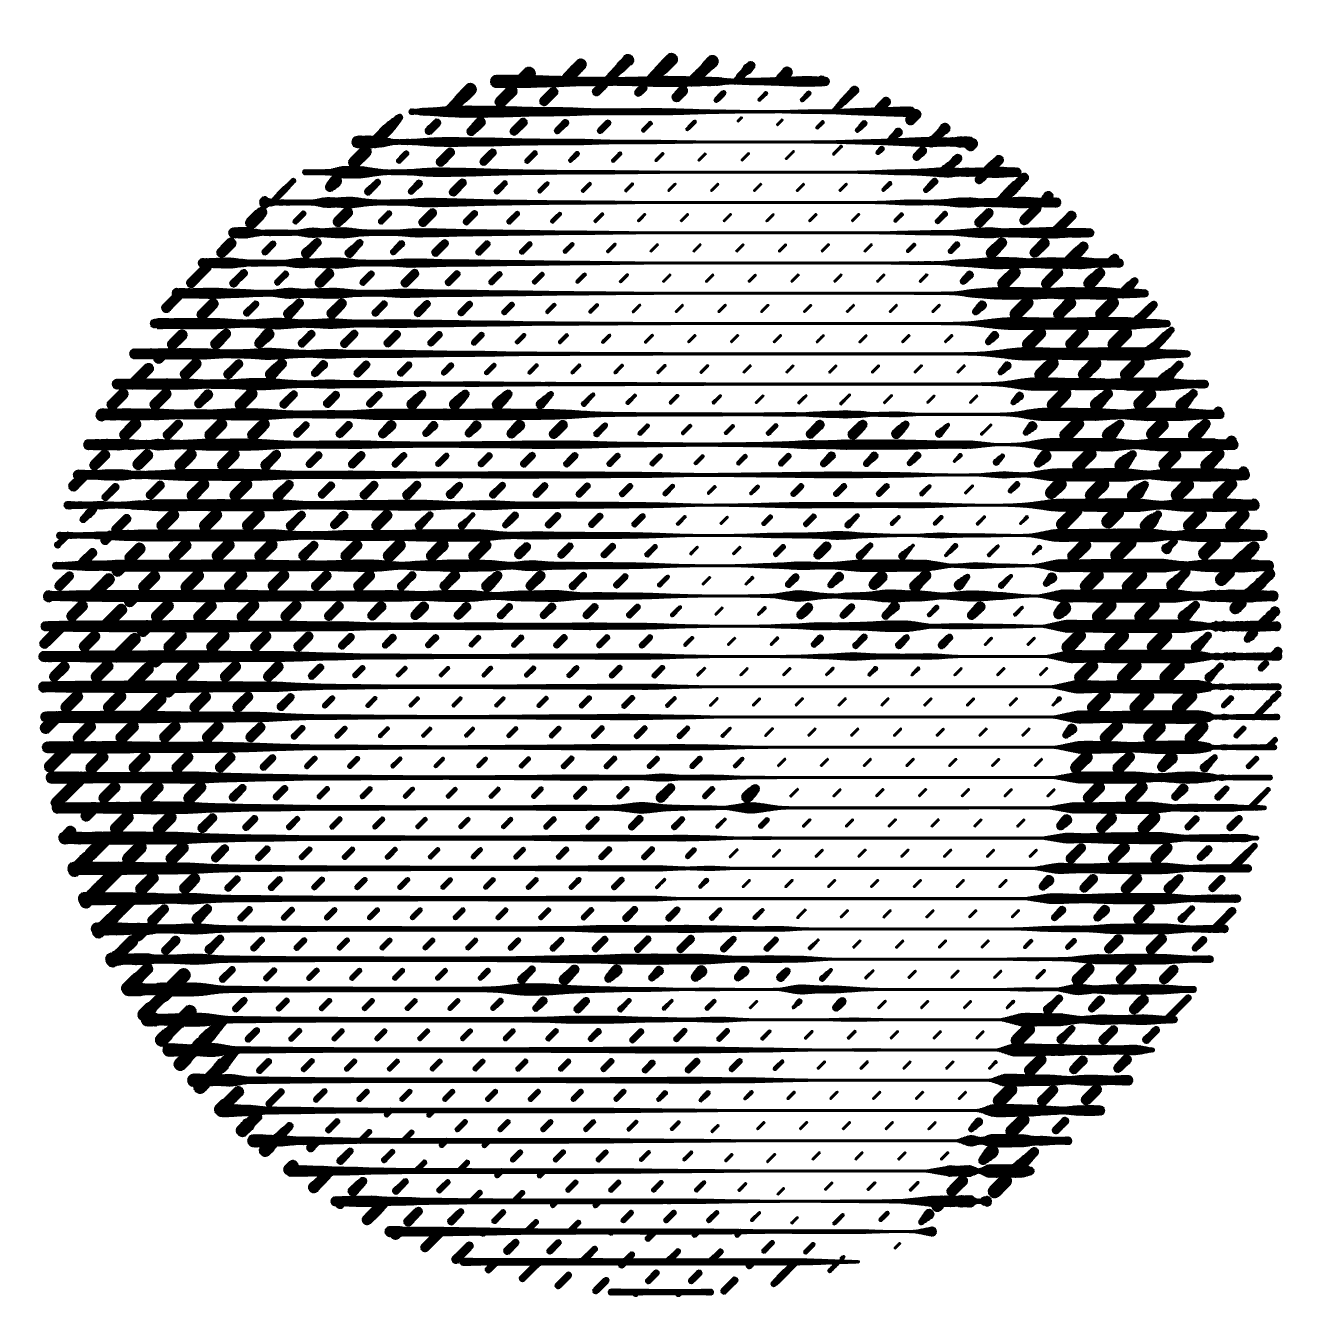
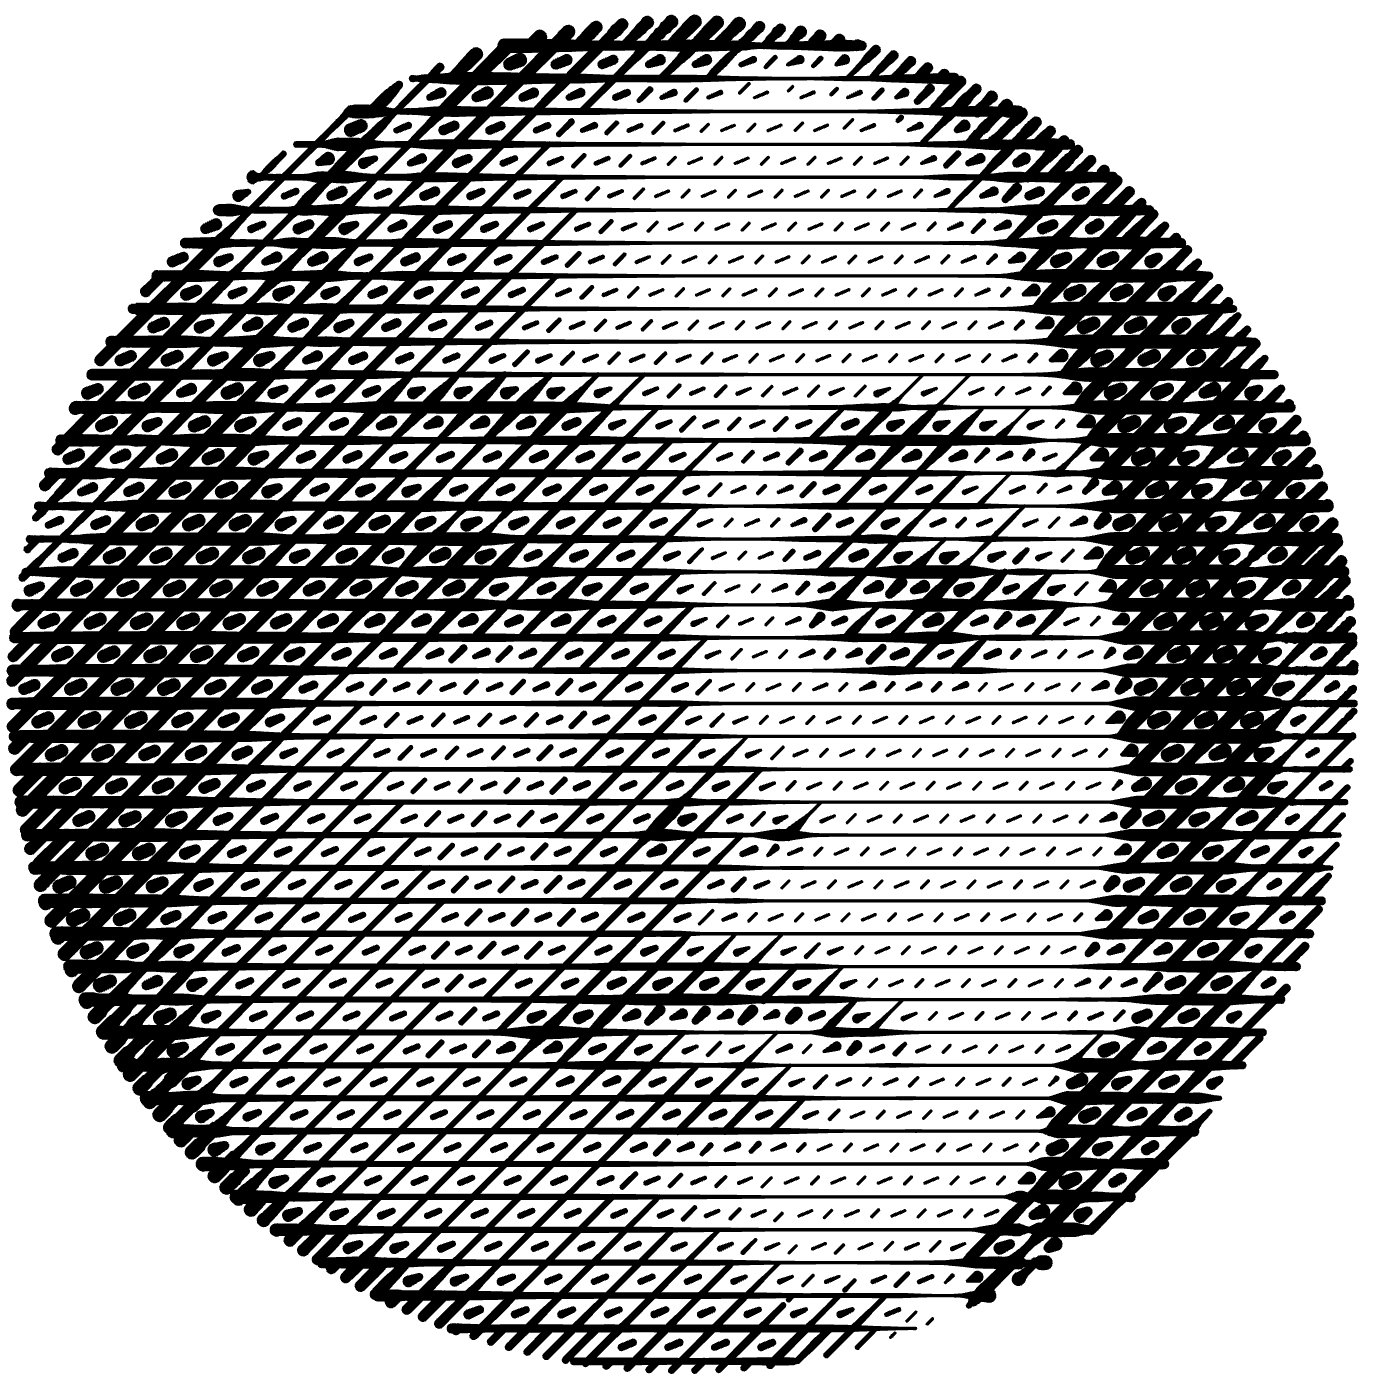
How Overlap Works: A Visual Example
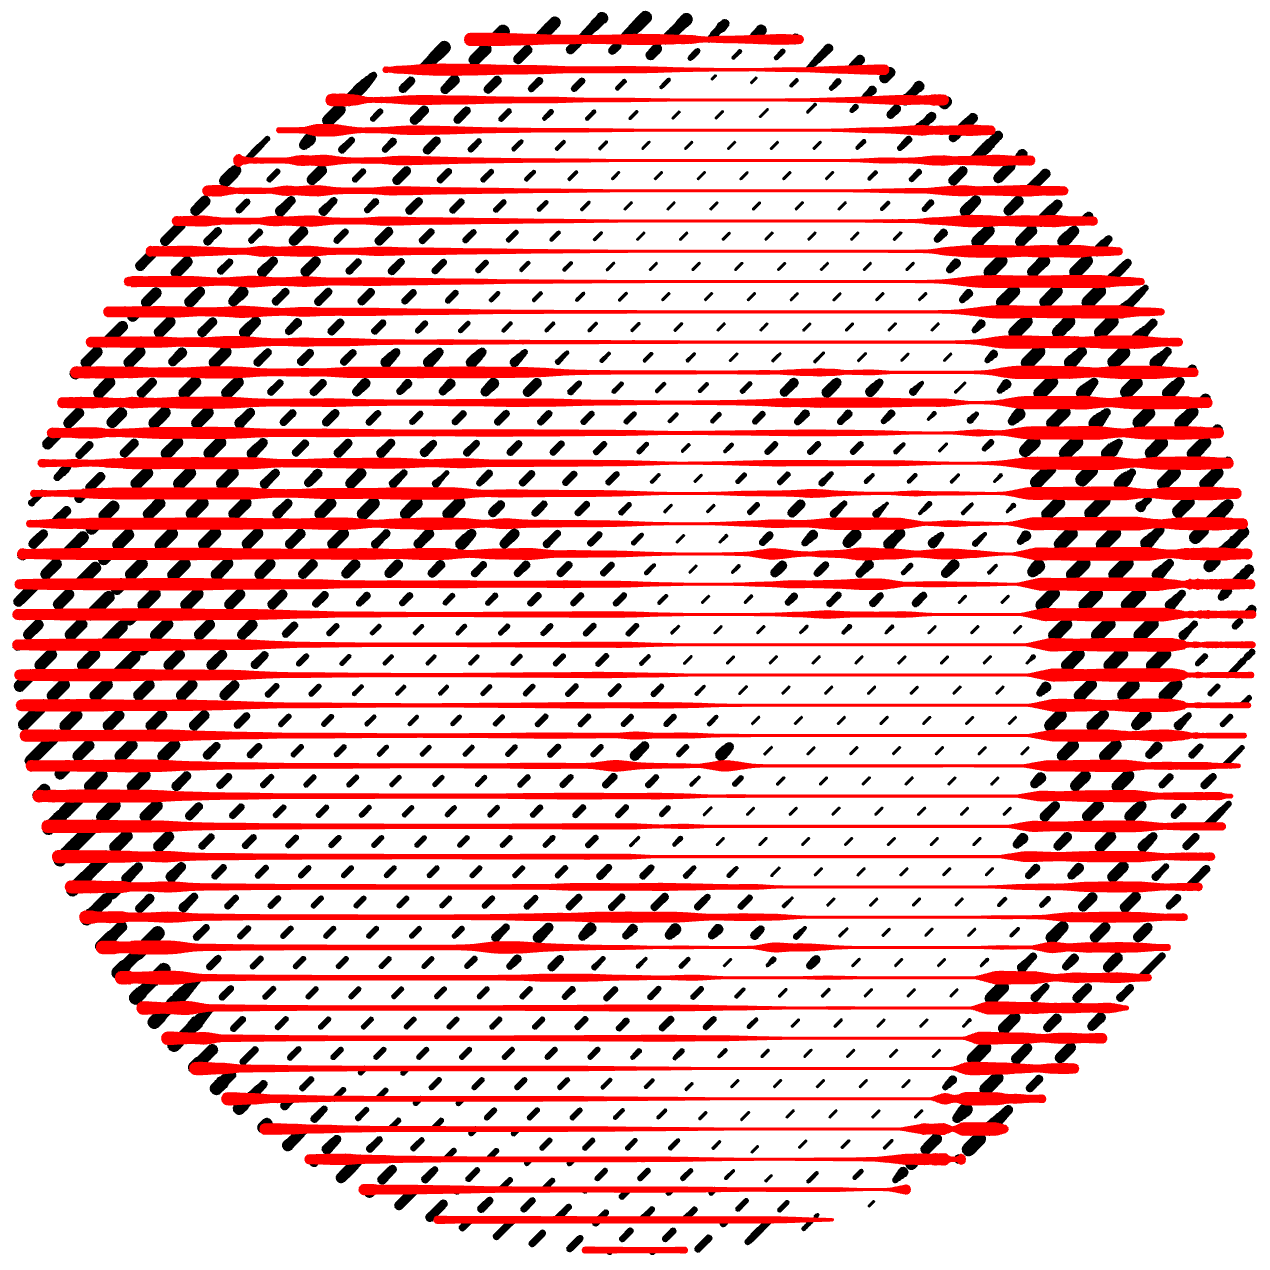
In this demonstration:
-
The red linear fill has cutting enabled:

-
The black linear fill has cuttable enabled:

-
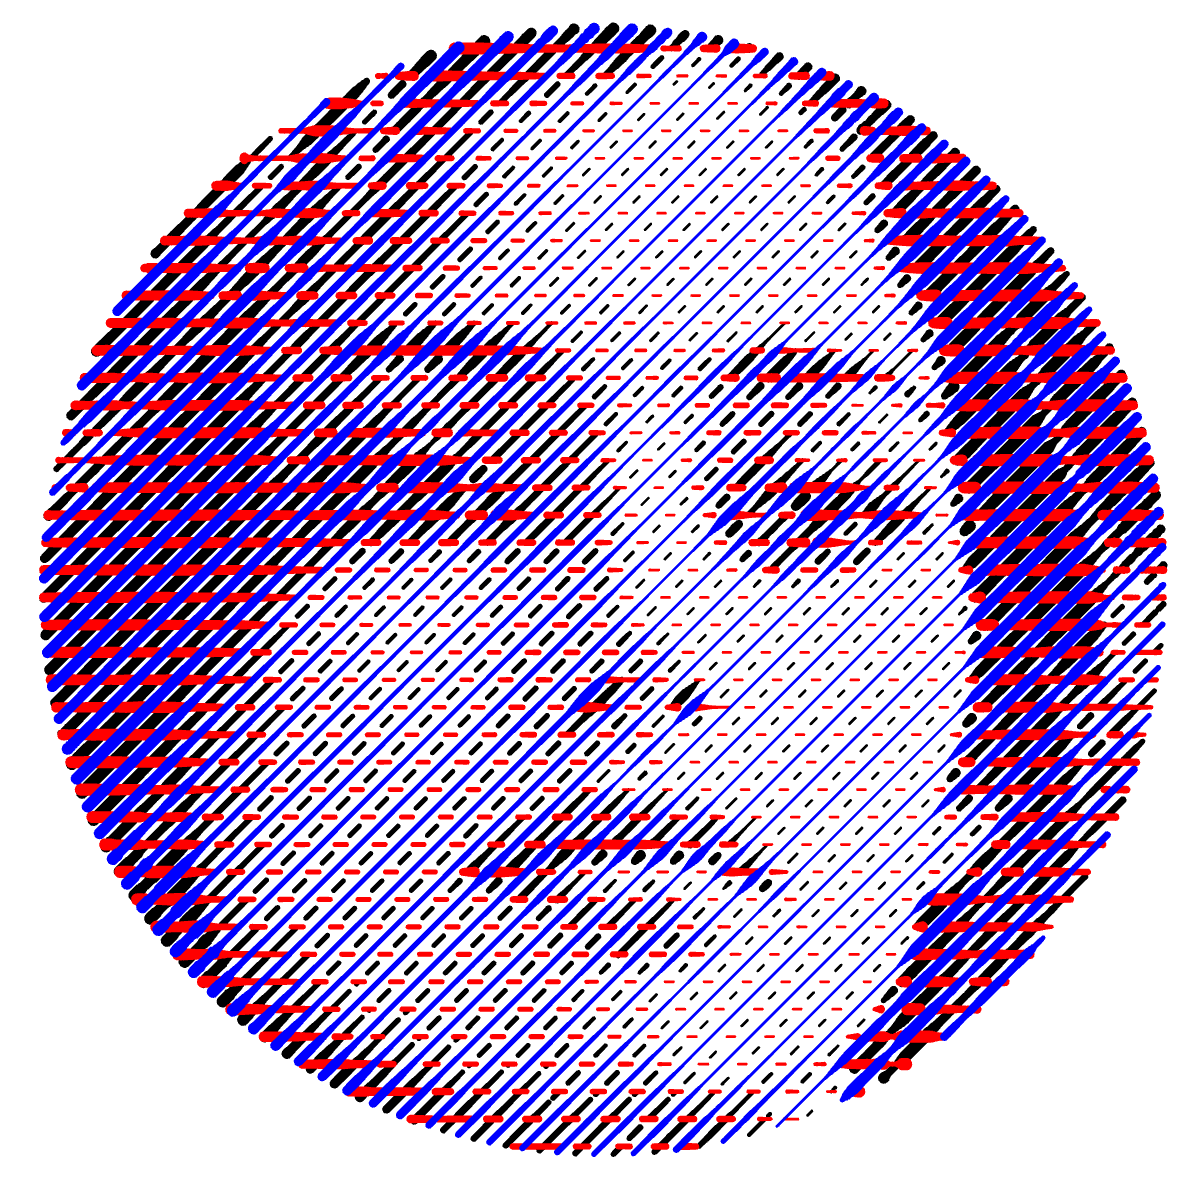
We add a blue linear fill (parallel to the black one with 50% offset) and configure it as follows:
- Enable cutting property on the blue fill
- Enable cuttable property on the red fill (giving the red fill both properties)

-
Final result: The blue fill cuts through the red one, while the red one cuts through the black one:
Try it yourself: Download this example here.
Advanced Options
Each overlap property offers additional customization options for precise control.
Scope
Cutting scope: Define how far the cutting effect reaches:
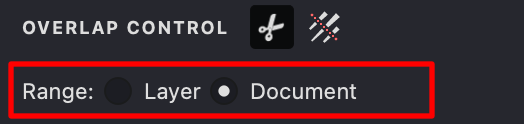
- Layer: Restricts cutting to affect only fills within the same layer
- Document: Extends cutting to affect all compatible fills throughout the entire document
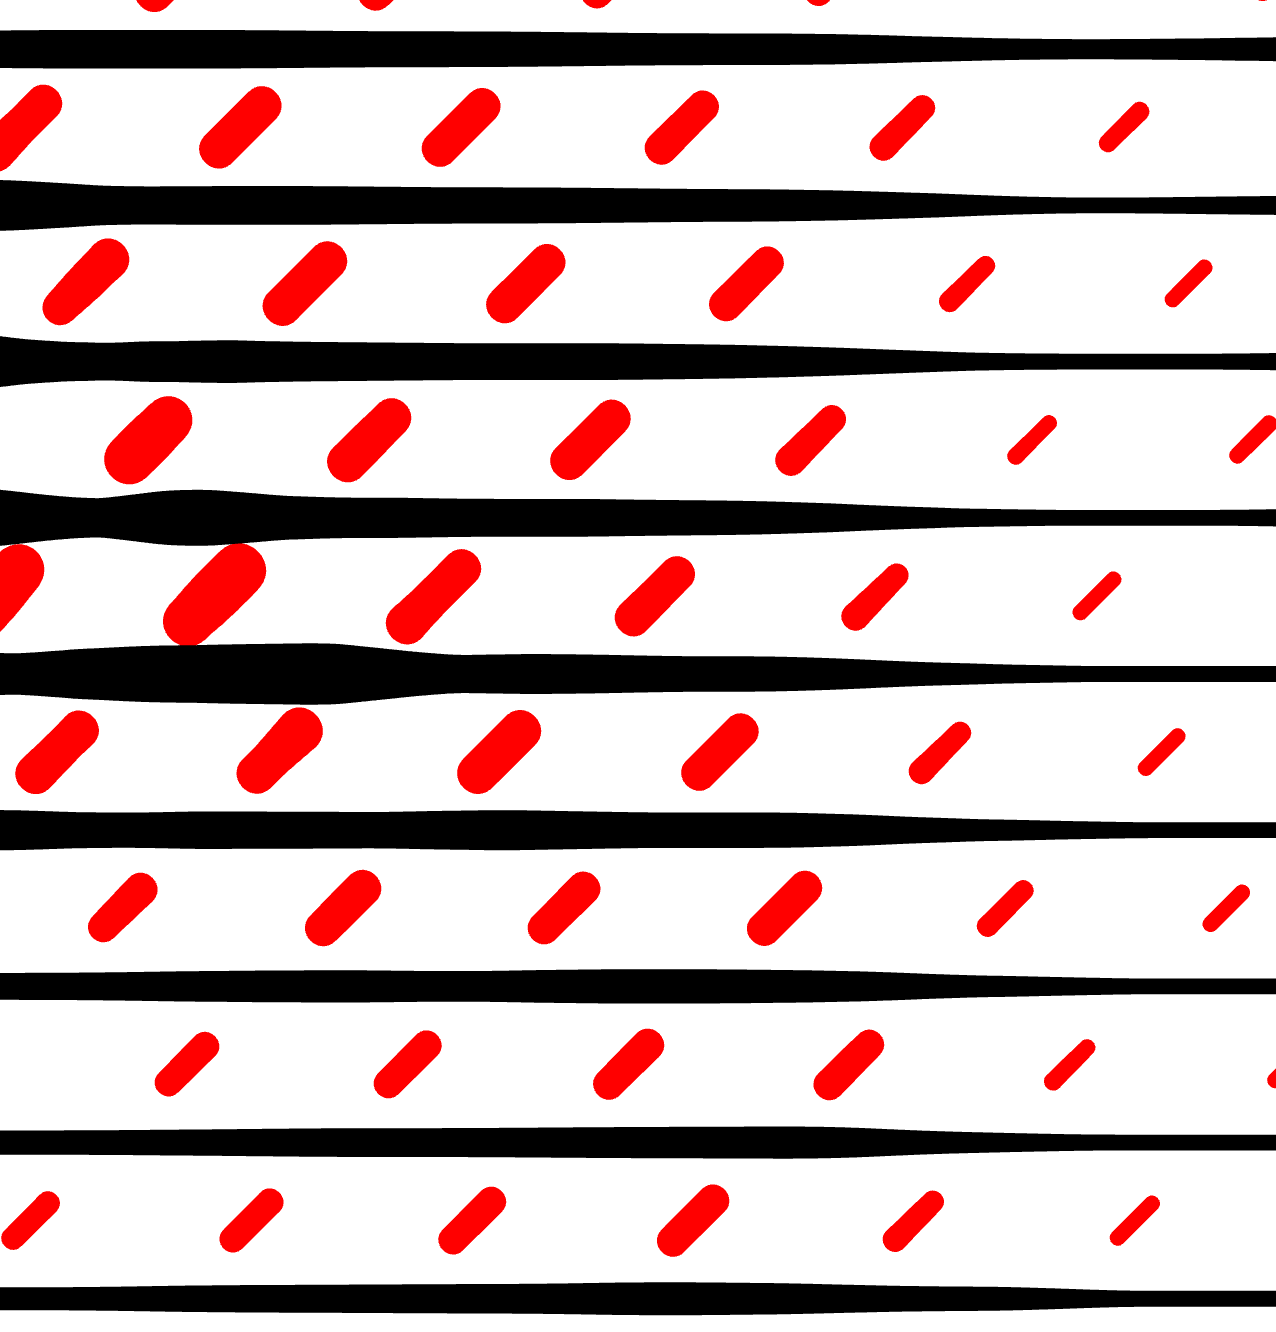
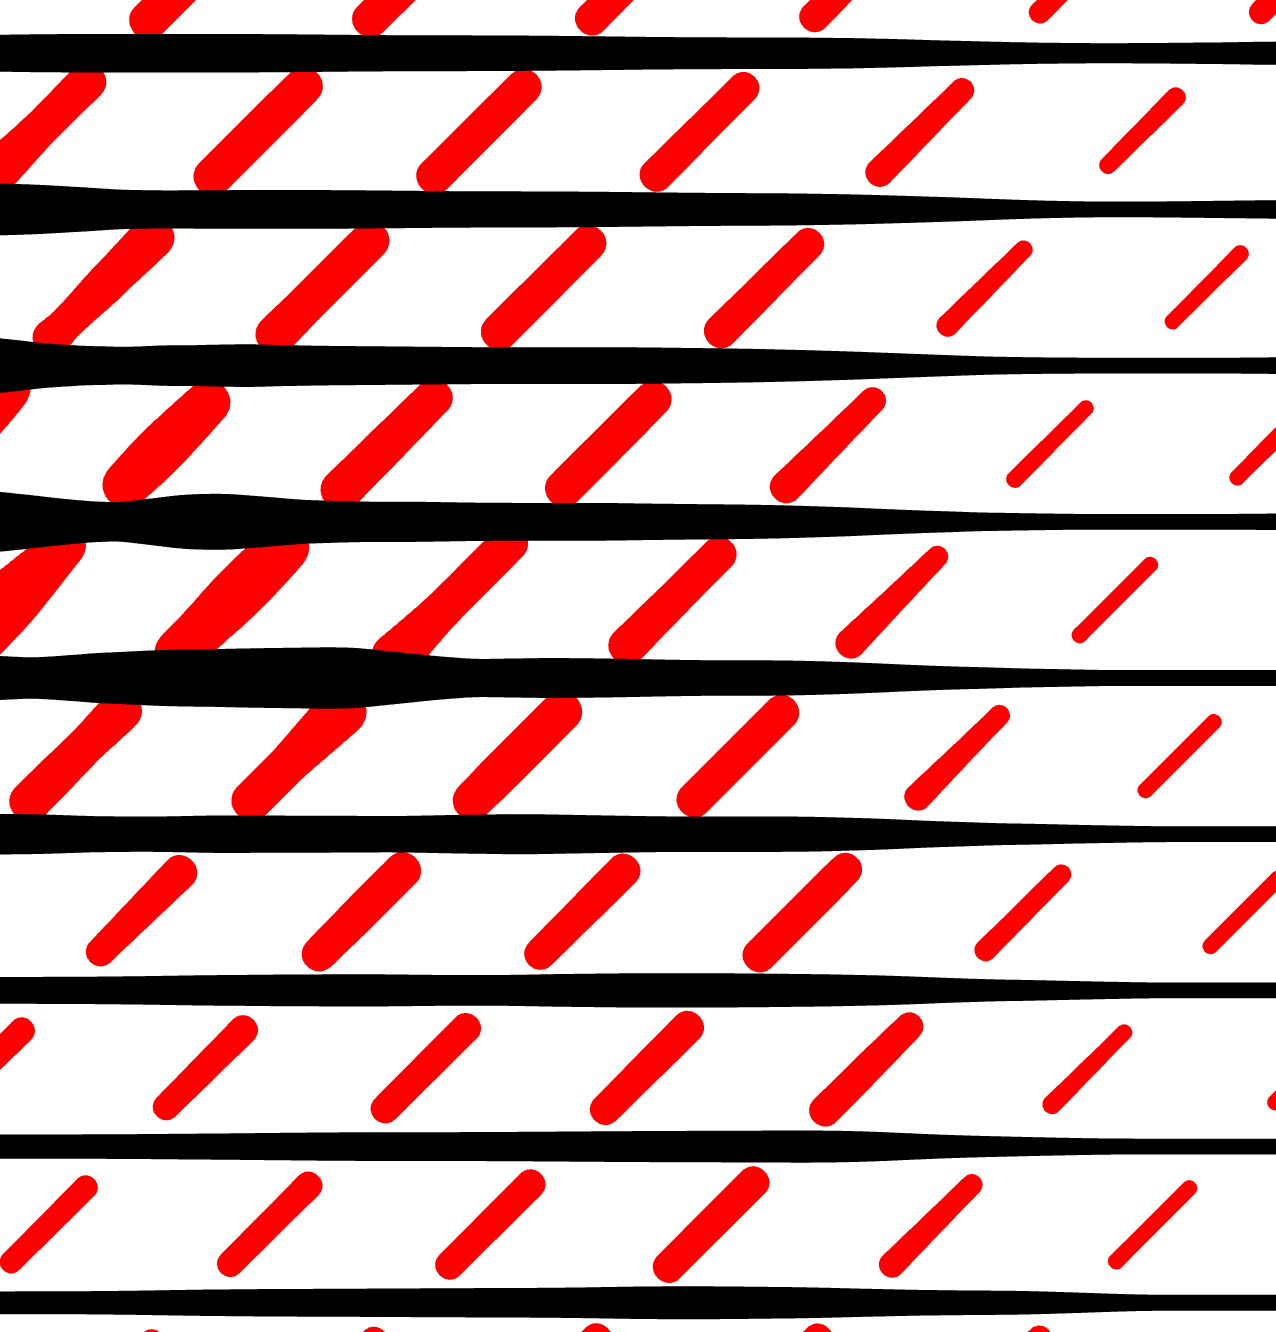
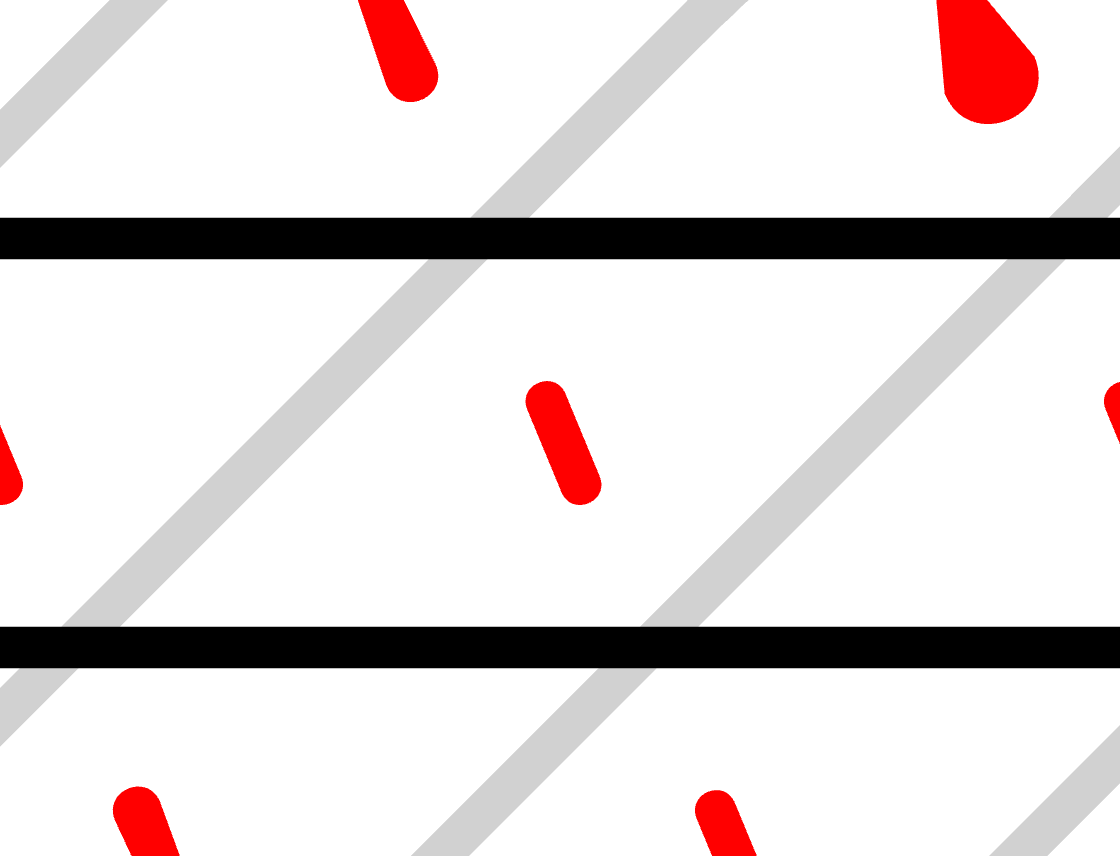
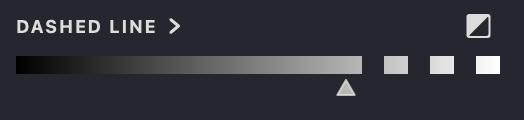
Dash and Gap
Dash and Gap: Control how segments appear between cut points:
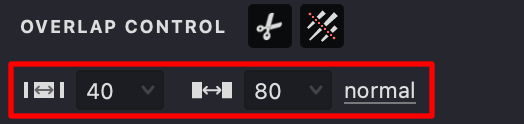
- Dash: Controls the length of visible line segments between cut points
- Gap: Controls the length of empty spaces between dash segments
Visual examples of different dash and gap combinations:
| Dash: 40, Gap: 80 | Dash: 13, Gap: 95 | Dash: 80, Gap: 55 |
|---|---|---|
 |
 |
 |
Stroke Orientation
Orientation determines how dash segments are rotated between cut points, offering various artistic possibilities:
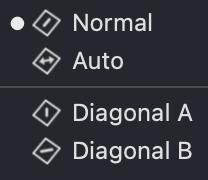
- Normal: Keeps dashes aligned to the original fill line's direction
- Auto: Automatically orients dashes along the longest diagonal path
- Diagonal A: Forces dashes to align with the first diagonal path
- Diagonal B: Forces dashes to align with the second diagonal path
Visual comparison of orientation options:
| Normal | Auto | Diagonal A | Diagonal B |
|---|---|---|---|
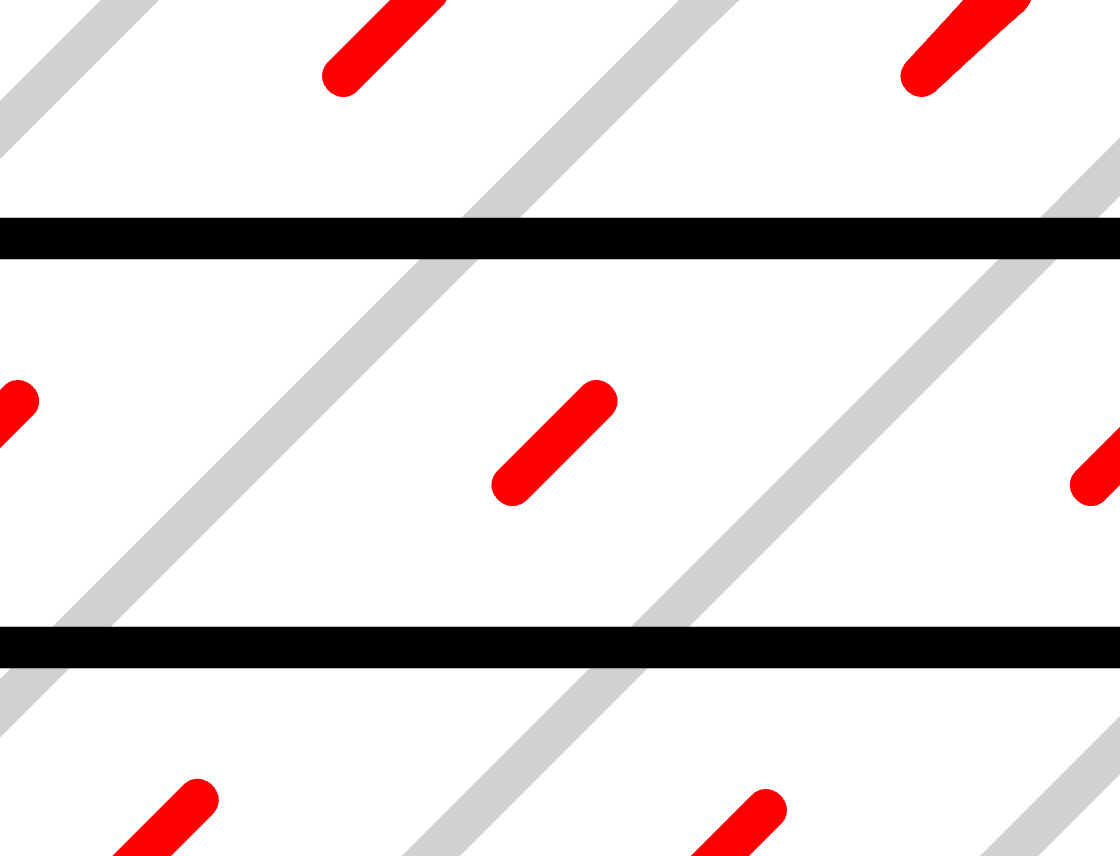 |
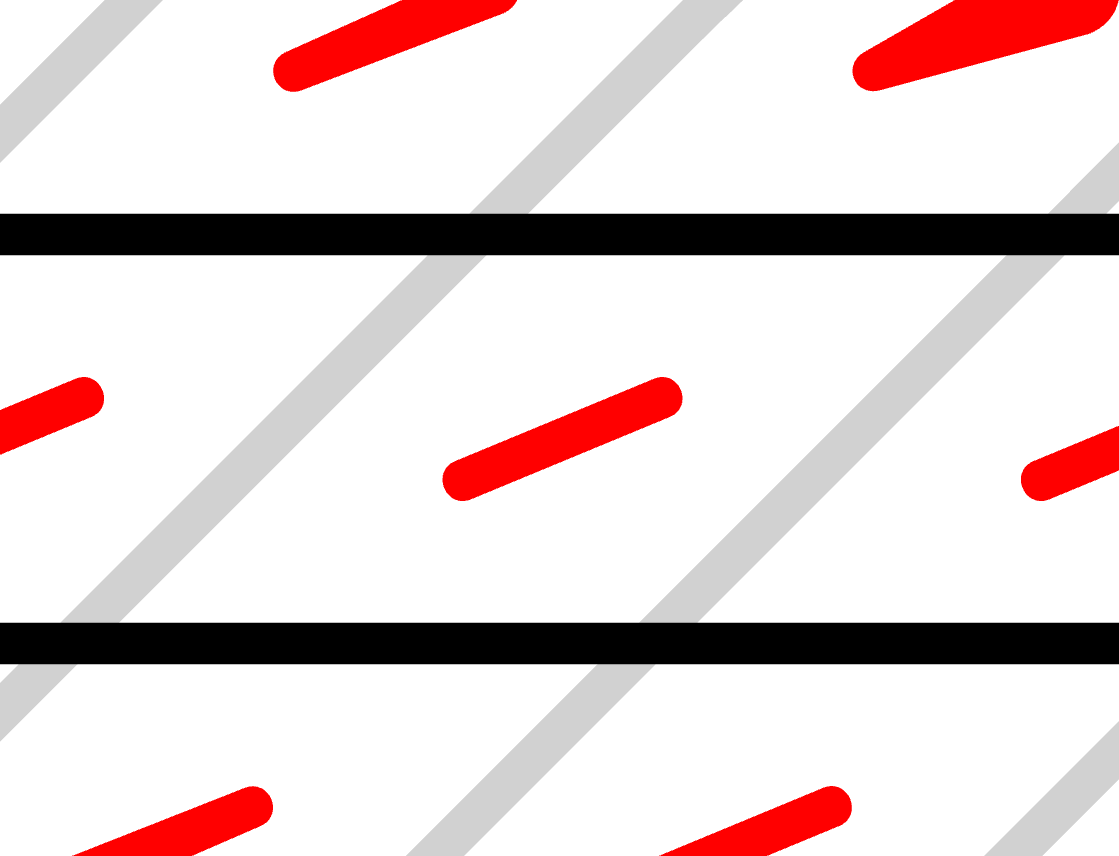 |
 |
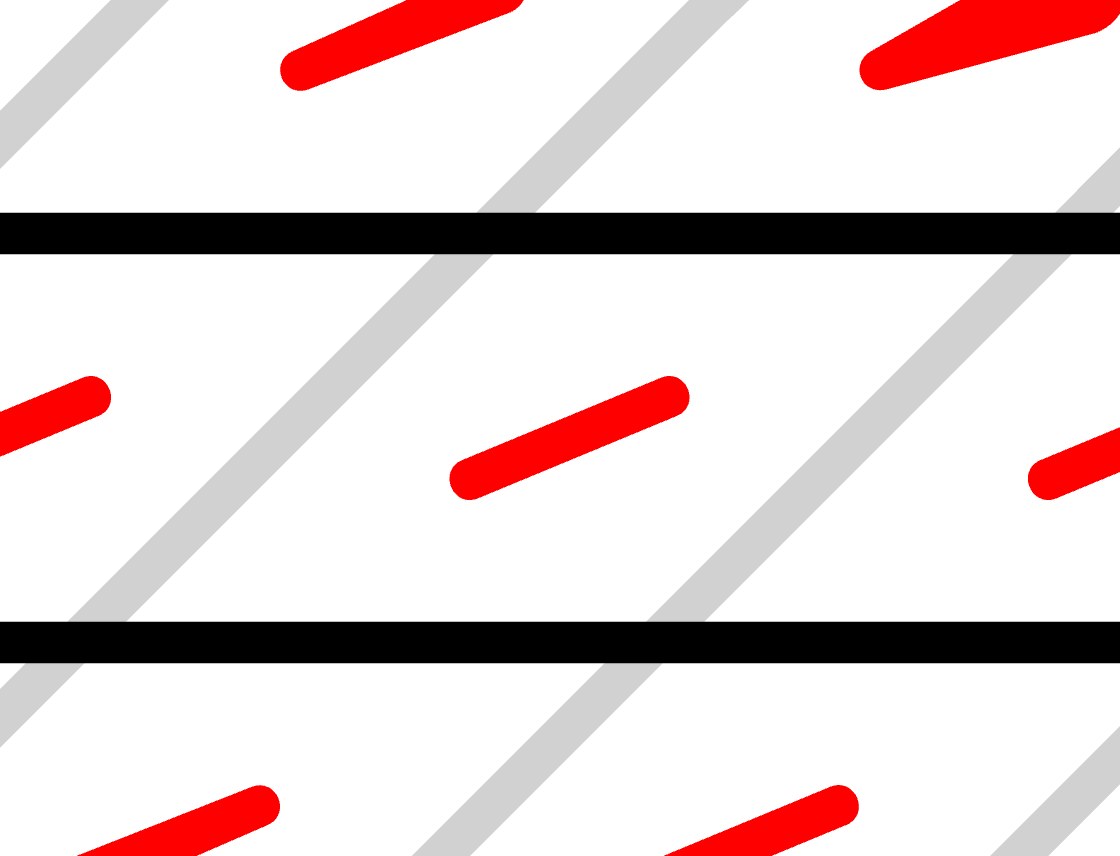 |
Here's our example with diagonal orientation applied:
Try it yourself: Download this example here.
Synchronizing with Dashed Lines
The Threshold property in the DASHED LINE panel can be used to coordinate cuts with regular dashed lines. This allows you to create consistent patterns throughout your artwork.
By enabling the dashed line option on your cutting fill and setting similar threshold values across all fills, you can achieve harmonized patterns like this:

Try it yourself: Download this example here.
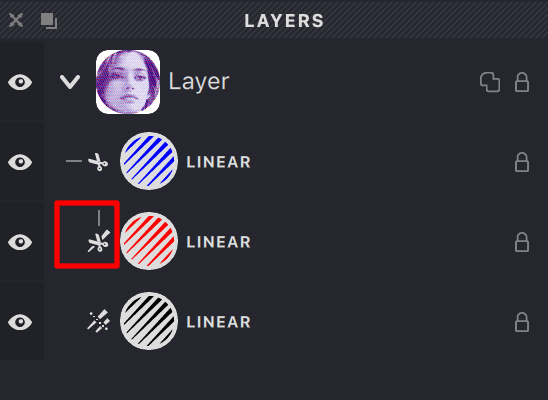
Quick Controls in the Layers Panel
For efficient workflow, the LAYERS panel includes quick access to overlap controls:
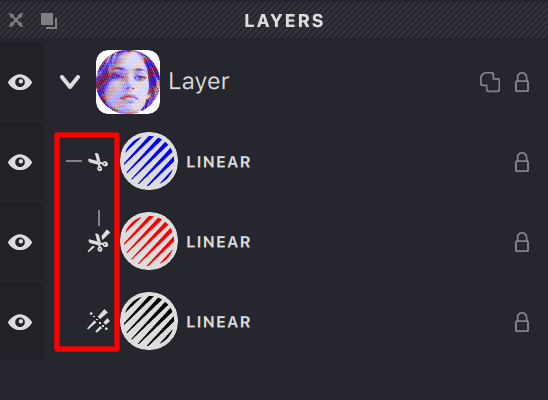
-
Global cutting is indicated by a horizontal line to the left of the scissors icon:
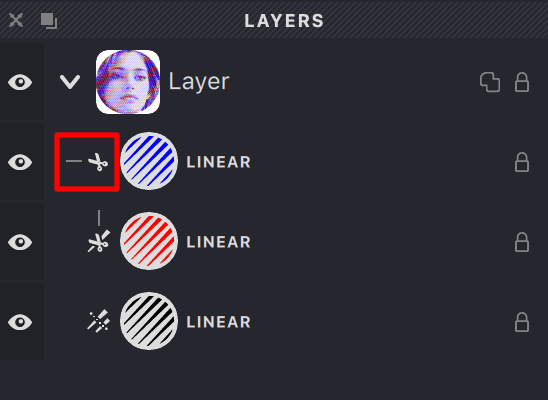
-
Local cutting is indicated by a vertical line above the scissors icon:
-
If a fill has both cutting and cuttable properties enabled, a combined icon appears.
You can toggle these properties directly by clicking the icon or the lightly highlighted area that indicates available but inactive properties.
Example File
For a comprehensive demonstration of all these techniques, download the example file: UM3-Overlap-Control-4.lines.