The Toolbar gives you quick access to essential tools and controls. Located at the top of the workspace, it's designed to streamline your workflow.
Tool Buttons
These tools help you create, select, and modify objects in your designs.

 Editor tool (V) - Your primary selection and manipulation tool. Use it to select objects, move and transform elements, edit curve points, and modify nodes with precision.
 Meter tool (R) - Measure distances and angles in your chosen unit system. Displays length in current document units and angles in degrees, perfect for precise alignment and planning.
 Pencil tool (P) - Draw freehand strokes to create and edit Handmade fills. Ideal for tracing irregular shapes and adding natural-looking artistic details.
 Knife tool (K) - Insert points, split curves, or cut paths. Perfect for dividing shapes and refining contours in Handmade fills and mask editing.
 Transform tool (T) - Rotate, resize, move, and skew objects with precision controls.
 Brush tool (B) - Paint mask areas with natural brush strokes, with pressure sensitivity support for tablets. Ideal for creating organic, painterly mask effects.
 Rectangle tool (I) - Create rectangular masks for applying fills to specific areas. Hold Shift for perfect squares and use auto-detection to capture shapes in images.
 Ellipse tool (O) - Create circular or oval masks for applying fills to specific areas. Hold Shift for perfect circles and use auto-detection features for existing shapes.
 Freeform tool (S) - Create custom-shaped masks by drawing freehand or using automatic shape detection. Perfect for complex or irregular mask areas.
You can toggle text labels for tools through Window -> Toolbar -> Text Labels.

Refresh buttons
These controls determine how and when fills update after making changes to your document.

 Auto Refresh - When active, fills and layers update automatically as you make changes.
 Refresh Fill - Updates only the currently selected fill.
 Refresh All - Updates all fills and layers throughout your document.
To show this panel in your toolbar, go to Window → Toolbar → Refresh Buttons.
Undo buttons
These buttons let you step backward or forward through your editing history.
 Undo - Reverses your last action, letting you step back through your editing history.
 Redo - Restores actions that were previously undone, allowing you to move forward in your editing history.
To show this panel in your toolbar, go to Window → Toolbar → Undo Buttons.
Zoom buttons
These controls adjust your view of the artwork, helping you focus on details or see the big picture.

To show this panel in your toolbar, go to Window → Toolbar → Zoom Buttons.
 Zoom in - Magnifies your view to see fine details.
 Zoom out - Reduces magnification to see more of your artwork at once.
 Zoom to Selected - Automatically zooms to frame your currently selected objects.
 Zoom to Actual Size - Shows your artwork at 100% scale.
View mode buttons
These buttons control what elements are visible in your workspace, helping you focus on specific aspects of your design.
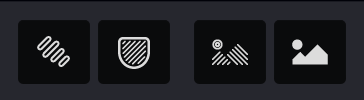
 Highlight edges - Makes stroke and shape edges more visible for easier selection and editing.
 Show masks - Toggles visibility of masks and mesh edges in your document.
 Show fills - Toggles visibility of all fill patterns in your document.
 Show images - Toggles visibility of imported reference images.
Activation button
This button appears only in unregistered copies of Vexy Lines. Click it to activate your software and unlock all features.